The best souvenir from a trip is the photographic evidence of a memorable holiday. It can sometimes feel like a chore to capture all the right moments while still enjoying your vacation, but finessing the art of taking a good photo can take some of that pressure off. There are always going to be obstacles: tourists invading the shot, issues with lighting, or unpredictable weather, but having a strategy makes it that much easier. Here’s a list of some of my tips and tricks for Instaworthy travel photos.

Find one of a kind experiences
The world of Instagram has opened up off-the-beaten track instaworthy locations. The Tirta Gangga Water Palace in Bali or Peggy Porschen Cupcakes in London have quickly become iconic destinations due to their popularity on Instagram.
I live for a well-planned itinerary, so before I head on any trip, I will turn to Pinterest to discover travel blogs that have insights into the attractions worth visiting, beyond what would be suggested on TripAdvisor or other mainstream travel sites. I usually put together a list and segment it by area, so I can group attractions by proximity.
Instagram is my other go-to spot for finding unique attractions. Lisa Homsy, Jacob Riglin, Haylsa and Angela Liggs fill their feed with wanderlust-worthy travel images. Now that Instagram also has story highlights, most travel influencers will create a section for each destination that you can refer back to anytime.
When to get the best shot
This is an easy rule to remember, but the best time to get the shot is first thing in the morning before anyone else is up! This can be hard at museums or other attractions that have certain hours of operation, but for hiking trails, waterfalls, and basically any outdoor attraction, getting there right before sunrise is the perfect time to not only get an amazing golden hour shot, but also avoid dealing with crowds. Google can tell you the exact time for the sunrise, so you can plan your day accordingly.
Photograph everything
One regret I have from my early trips is that I only focused on taking photos of the attractions. I wish I had captured photos of the neighbourhoods and the hotels I stayed in; having photos of the streets showcase the charm and the vibe of the destination. I also find that sometimes, the simplest photos or backdrops are the best setting for great photographs. When I’m travelling, I try to bring my camera with me everywhere I go.
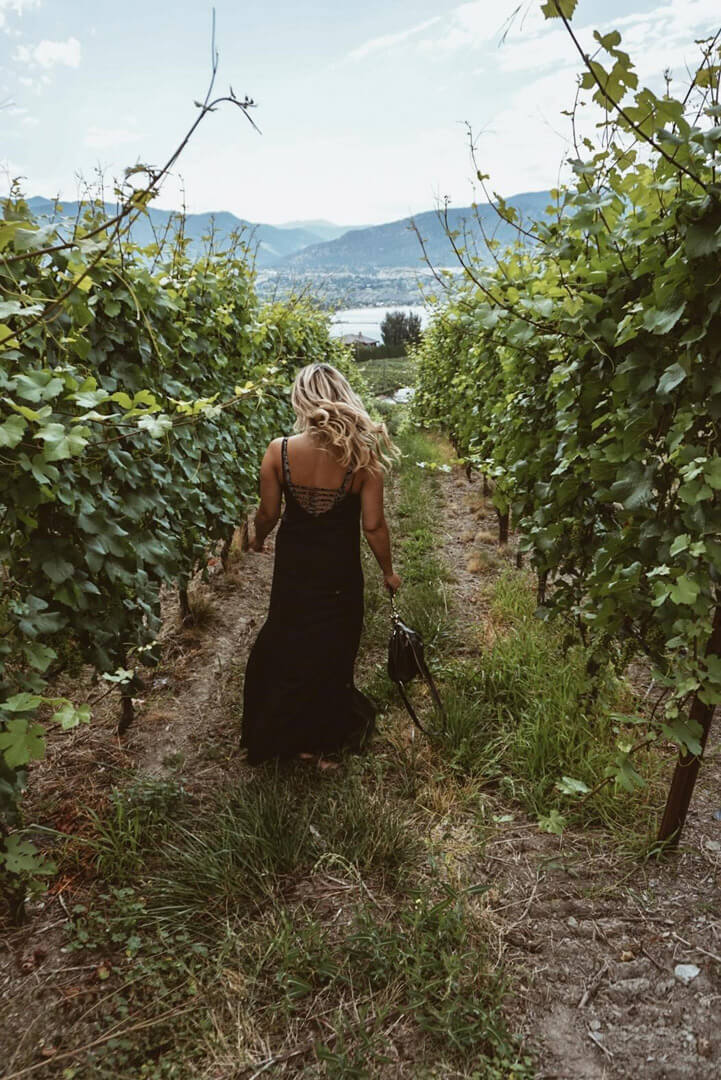
Strike a pose
A photograph is instantly ruined with a tacky tourist pose. Photos taken from behind with the attraction in the backdrop are always a safe bet. To create more interest, you can always look back at the camera.
Adding some movement to the photo can also create more interest, so either stepping forward and backward, twirling or running towards the camera work great!
The easiest pose to master is just standing in the middle of the frame and looking off to the distance. I usually look at my photographer’s ear, so I’m just slightly looking away from the camera.
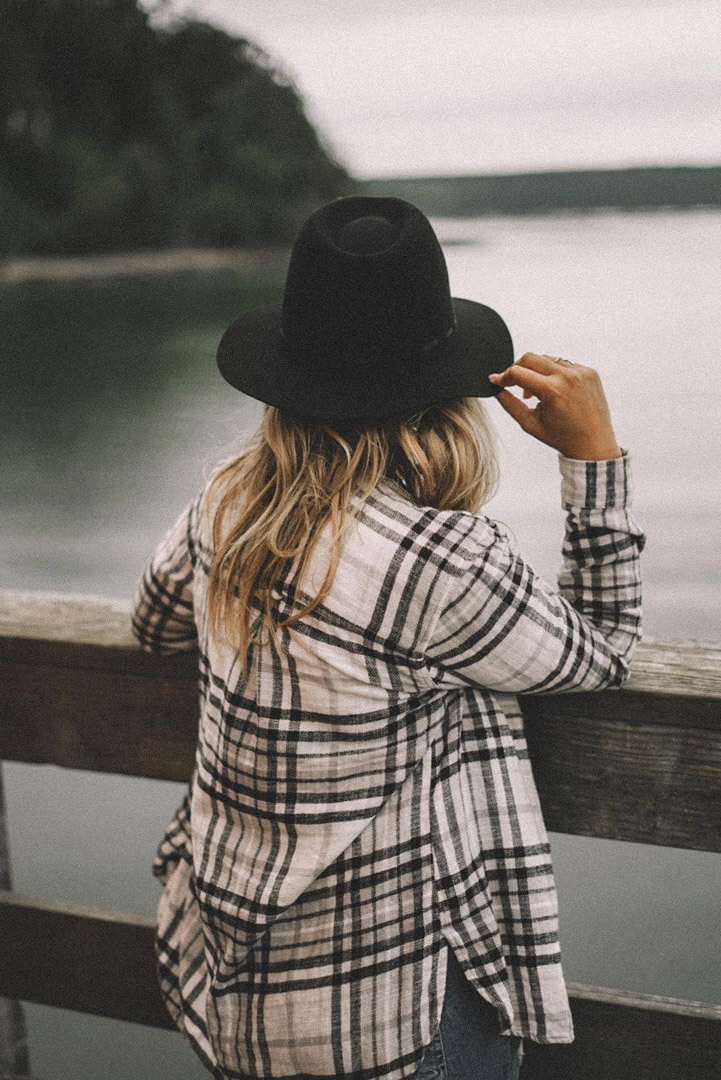
Use props
Most people feel very uncomfortable in front of the camera. For me, I find that my best photos usually involve a prop. I like to use my backpack, my hat, or a book as a prop. Most of the time, I have no idea what to do with my hands, so a prop is nice to prevent me from awkwardly having them hang on by my side.
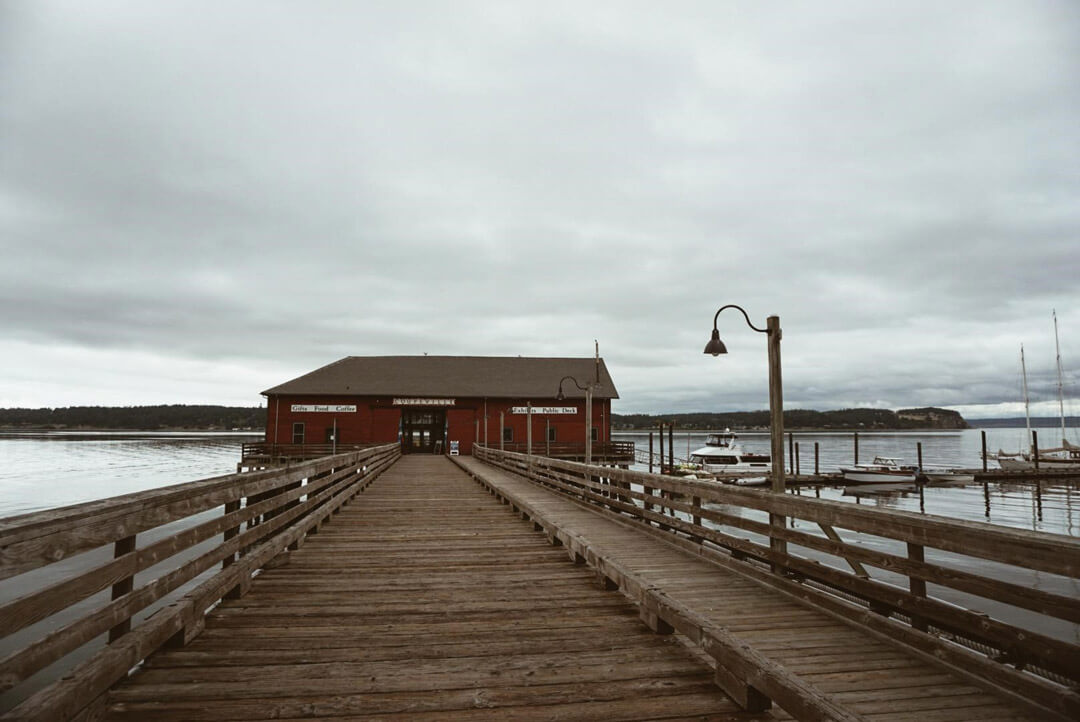
Photo composition
Following basic photography rules makes all the difference in shot composition. I like to follow the rule of thirds; this involves breaking down your screen into nine equal parts by placing three lines vertically and three lines horizontally. The focal points for the images must be placed within the intersecting lines in order to create a balanced photograph. Usually to get a good shot, I put the subject in one of the focal points. I like to have the subject either off to the left or the right of the frame rather than right in the middle. iPhones actually come with a grid setting, you can turn it on by going to the settings in your iPhone, clicking on camera and flicking on the grid.
Leading lines are also useful for creating interest in the frame. Using the lines from a bridge, a pathway, or a building tends to lead the eye in a certain direction and creates visual interest. This is done by positioning the shot so that the leading lines create a path for the eye to follow.
Another key to creating interest is changing the perspective of the shot. I like to try and take my photos from the ground looking up, depending on the subject matter. When I’m shooting, I play with the location of the camera so I can get a variety of different points of view. The more test shots, the merrier!
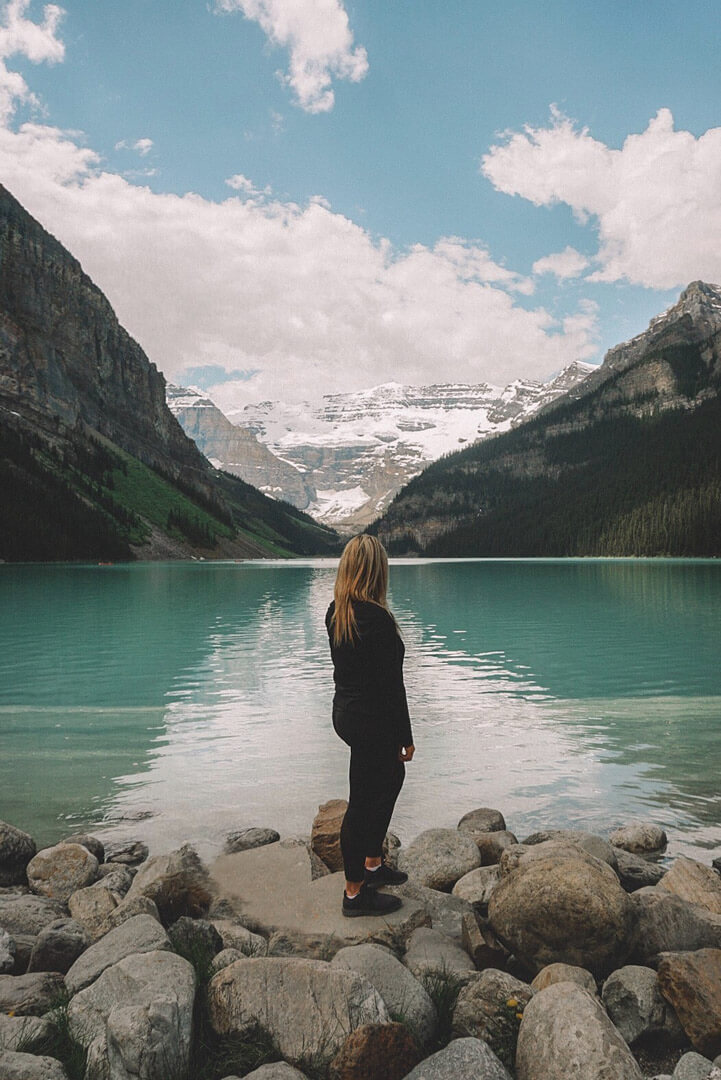
Photo editing
I have a love/hate relationship with editing. I love when I’m able to master editing a photo, but I also struggling to find the right balance ofoverexposure and correct lighting. Most of my photo editing is doneon my phone, and I have a routine for manipulating my images.
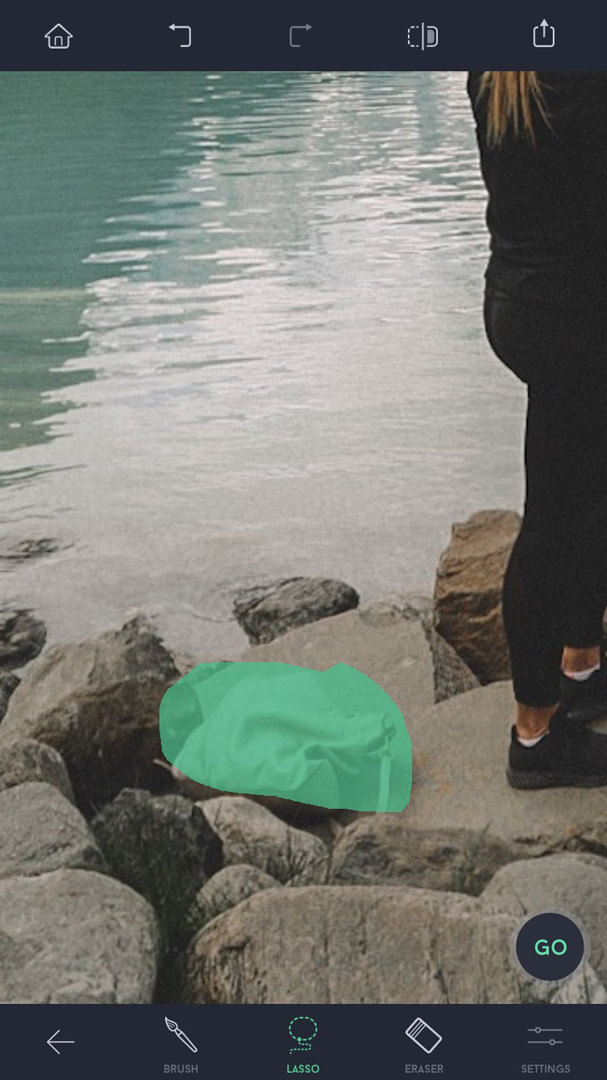
My first step is pulling the photo into Touch Retouch or Facetune. I use these apps to remove the garbage from the street, people in the background or touch up anything that distracts from the main focus of the photo.
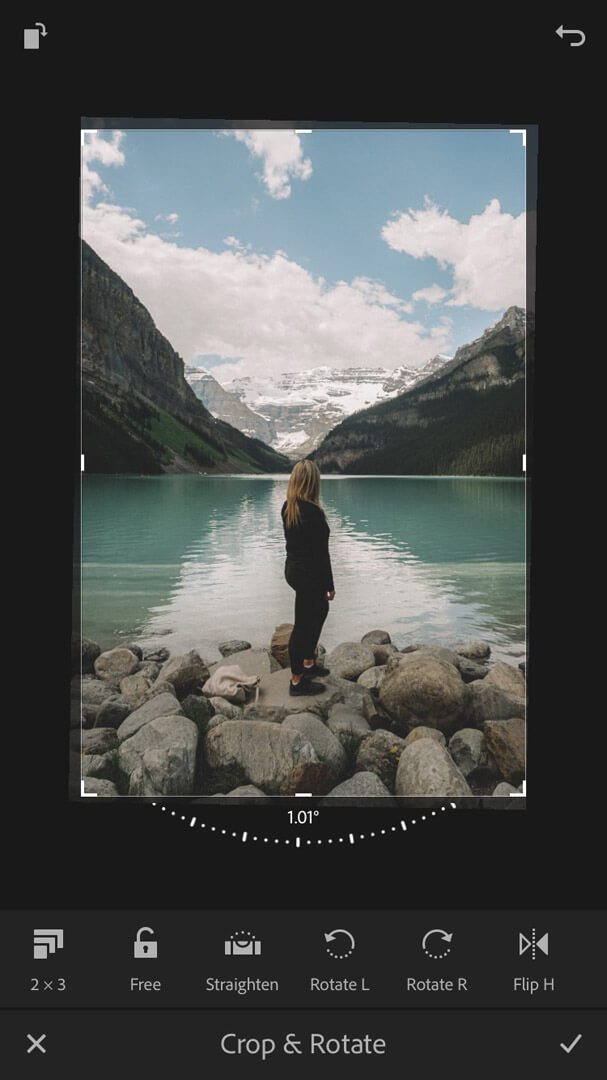
Next, I use Lightroom to adjust the lighting, straighten and crop the photo (I usually set all my photos to 5 x 7) and then adjust the colours. Presets are the key to having a cohesive feed, so I usually alternate between a few different sets for consistency.
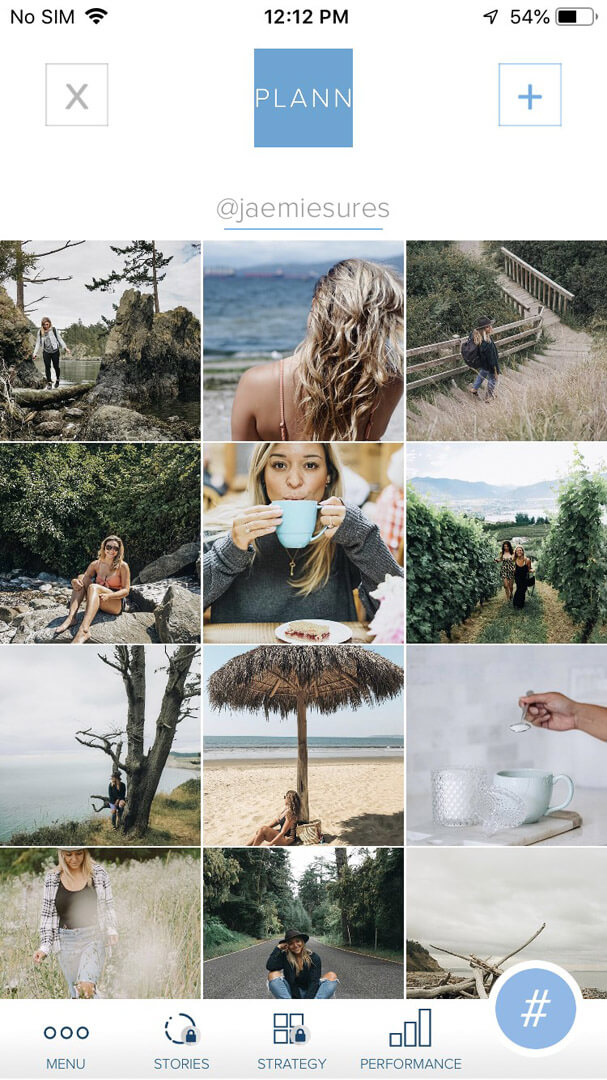
Plan your feed
I change my mind on what I want to post all the time, so I plan my feed to get a sense of what it will look like. I use PLANN to load all my pictures, captions and hashtags. The program is super easy to manipulate, and it gives me a good idea of how my images will fit together. I try to have similar colours run through my photos so there’s cohesion throughout the feed. I’ve noticed that everyone has their own style for posting. One technique is to post three similar images consecutively as a series, while another is to stick within the same colour palette with all images. It really is just personal preference, but both result in a clean and visually appealing feed.
Final takeaways
The key to take better travel photos is really preparation. By choosing the right destinations and having the right tools to edit your photos, there will be a dramatic difference inyour photo quality. The saying ‘less is more’ was not created for a photographer, because the more variety of images you have, the better.
Happy shooting!
Jaemie
